Construction - Under the Hood
The i-Buddie XP we got our hands on had some powerful hardware inside including an Athlon XP 2100+ processor, a 20GB hard drive, 256MB of PC2100 DDR SDRAM, and a DVD-ROM drive.
At the heart of the i-Buddie XP can be any socket-A based AMD Athlon processor. The system can accept any speed Duron processor, Athlon socket-A processor, or Athlon XP processor at speeds up to 2200+ (1.8GHz). As a desknote system, swapping out the processor in the i-Buddie XP could not be easier. The CPU can be found by removing the CPU access panel on the bottom of the system and removing four screws holding the heatsink in place.
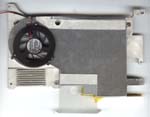
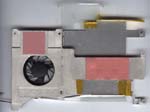
The heatsink on the i-Buddie XP was very similar to the heatsink on the i-Buddie 4 with the only noticeable difference being that the side of the heatsink located over the processor on the i-Buddie XP was larger than the plate over the i-Buddie 4's processor in order to fully cover the larger socket-A processor. Two heat pipes connect the plate that covers the CPU to a fairly large bonded fin copper heatsink. Air flow over the heatsink surface is provided by a large 60mm x 60mm x 10mm Sunon fan. We mentioned that the Sunon fan was somewhat of an over kill in the i-Buddie 4, but in the i-Buddie XP every bit of air the fan moves over the heatsink is necessary. The large fan is necessary to provide the needed airflow over the heatsink surface to keep the hot-running Athlon XP processor from overheating.
The fan remains temperature controlled and still fairly loud. Since the Athlon XP processor in the i-Buddie XP runs much hotter than the Pentium 4 found in the i-Buddie 4, the fan in our i-Buddie XP spun at full speed more regularly than it did in the i-Buddie 4.
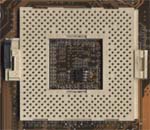
Once the heatsink is removed, the processor becomes visible.
Once removed, the socket-A processor is revealed. The processor is held in place in a socket that looks very similar to the desktop socket-A solutions except without the release lever. Instead of pulling up on a bar to release the processor, the socket used in the i-Buddie XP releases its grab when slid to the left. Inserting a flat blade screw driver into the slot on the right of the socket does the trick and makes for an easy upgrade path. To close the socket, just push from the slot on the left of the socket and you are set to go.
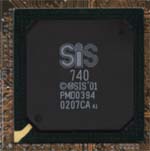
Since the i-Buddie XP is really just a desktop in a notebook form factor ECS had to turn to a desktop chipset to power the desktop processor. The i-Buddie XP uses the Athlon version of SiS' SiS 650 chipset, the SiS 740. Pair that with a SiS 961 southbridge and you have a smaller version of ECS' own L7SOM desktop motherboard.
The SiS 740 shares a very similar feature set to the Pentium 4 SiS 650 used in the i-Buddie 4. Both support DDR memory up to DDR333 and include a basic video controller. As we mentioned in our i-Buddie 4 review, the video part in the SiS 650/740 is not very powerful, consisting of only two rendering pipelines, two texture units per clock, and a shared memory solution. The chip is able to perform basic 3D tasks, but don't look to do any serious gaming on it.
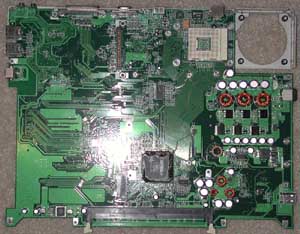
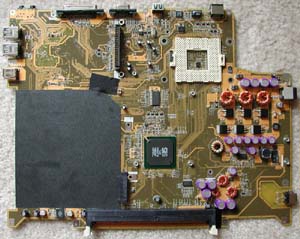
One advantage that ECS had when designing the i-Buddie XP was the experience gained from designing the i-Buddie 4. Since the SiS 740 comes in the same package as the SiS 650 and since both use the SiS 961 southbridge, modifying the system design to accept an Athlon processor was a fairly painless process. As we will see in a minute, the layout of the system motherboard is eerily similar to that of the i-Buddie 4's motherboard.
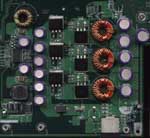
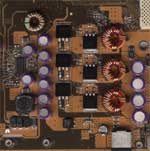
The desknote i-Buddie XP, making use of a desktop processor and desktop components, must also make use of a three-phase voltage regulator for providing the CPU with a correct and clean power source. The voltage regulator used in the i-Buddie XP was eerily similar to the one found in the i-Buddie 4. In fact, the layout of the i-Buddie XP's voltage regulator setup only differs from the i-Buddie 4's layout in the location of one or two capacitors.
Cooling the voltage regulator and the northbridge is also accomplished the same way in both desknote systems. The voltage regulator setup is covered by a thin metal plate which directs the air provided by a fan towards the potentially hot components. The SiS 740 northbridge is cooled in the same fashion, except in the case of the northbridge small fins atop the metal plate help aid in heat dissipation.
As you can see, the bottom layout of both the i-Buddie XP and the i-Buddie 4 are fairly similar. Again, ethernet connectivity is provided thanks to a RealTeK RTL8101L ethernet controller.




1 Comments
View All Comments
Anonymous User - Thursday, July 31, 2003 - link
Nice review. By the way, have you heard about the new ECS DeskNote A530 Notebook. Im looking for a review, unfortunately no luck. Maybe you can create a review in the future. Thanks and more power!